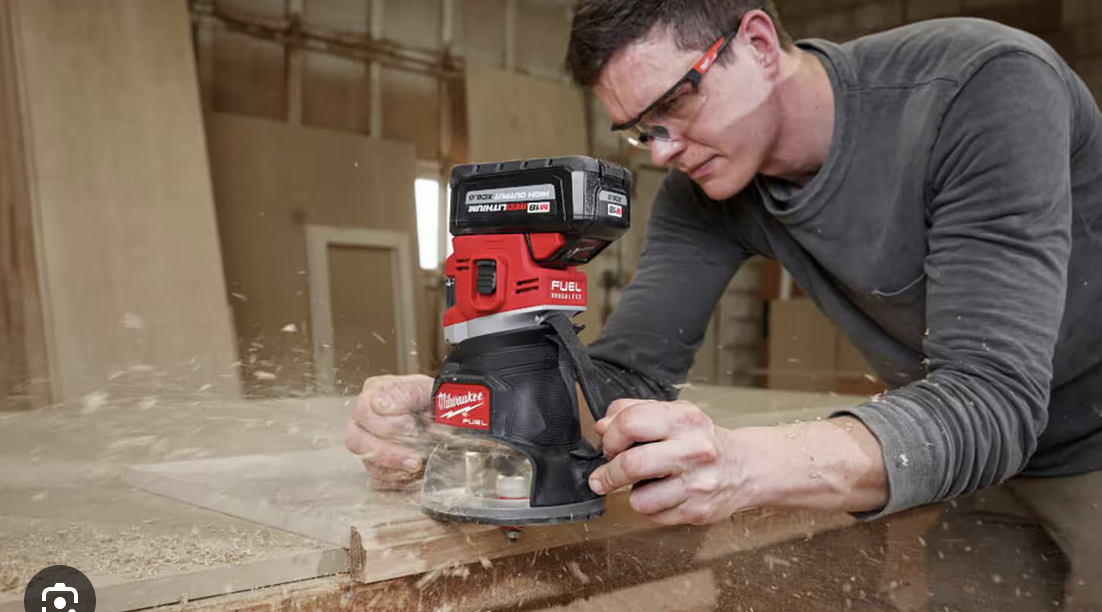
If you ask a veteran woodworker which tool they would never part with, the router is almost always at the top of the list. Often called the “Swiss Army Knife” of the workshop, the router is a high-speed powerhouse capable of transforming a rough slab of lumber into a polished piece of furniture.
Whether you are a hobbyist looking to add decorative edges to a picture frame or a professional cabinet maker cutting complex joinery, mastering the router is a rite of passage. In this comprehensive guide, we will dive deep into everything you need to know: from choosing the right machine to advanced techniques that will elevate your craftsmanship.
Understanding the Woodworking Router: What Is It?
At its core, a router is a motor-driven tool that holds a cutting bit and spins it at incredibly high speeds—typically between 8,000 and 24,000 RPM. Unlike a saw that cuts through wood, a router “hollows out” or “profiles” an area.
Why is it so essential?
The router’s versatility comes from the sheer variety of router bits available. By changing a bit, you can switch from cutting a structural groove (dado) to a decorative edge (ogee) in seconds.
Types of Routers: Which One Do You Need?
Before you buy, you need to understand that not all routers are built for the same tasks. There are three primary categories:
A. Fixed-Base Routers
The fixed-base router is the workhorse of the shop. Once you set the depth of the bit, it stays there.
- Best for: Edge profiling, repetitive tasks, and mounting in a router table.
- Pros: Lower centre of gravity makes it stable; easier to handle for beginners.
B. Plunge Routers
Plunge routers allow you to place the base flat on the wood and then “plunge” the spinning bit down into the material.
- Best for: Interior cuts, stopped grooves, mortises, and inlay work.
- Pros: Safest way to start a cut in the middle of a board.
C. Trim (Palm) Routers
These are compact, one-handed versions of a fixed-base router.
- Best for: Light edge trimming, laminate work, and small-scale crafts.
- Pros: Highly portable and less intimidating than full-sized models.
D. The “Combo” Kit: The Best of Both Worlds
Many modern manufacturers offer a Motor and Multi-Base Kit. This gives you one high-quality motor and both a fixed and plunge base, allowing you to swap depending on the project.
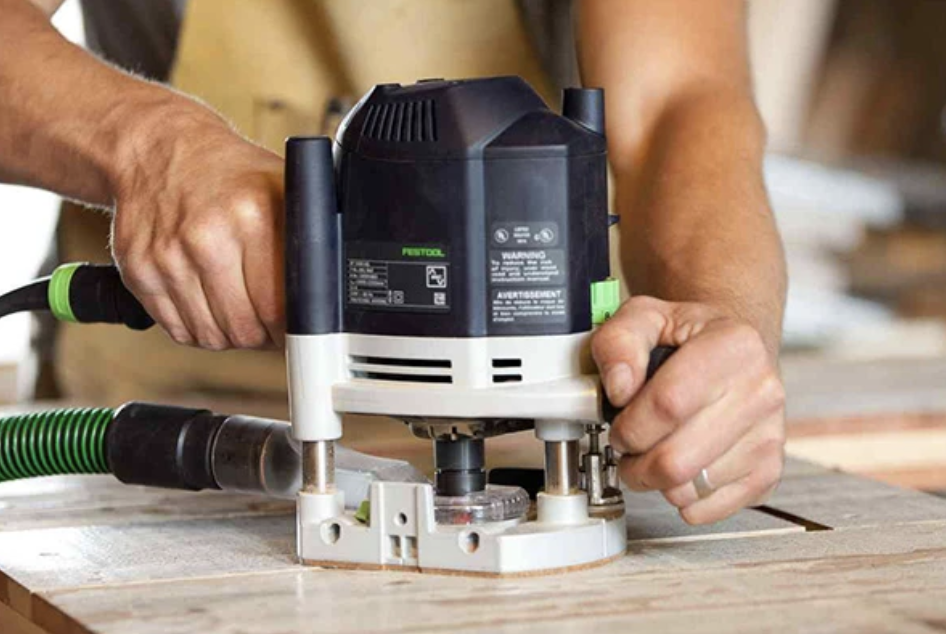
Anatomy of a Router
To use a router safely and effectively, you must know its components:
- The Collet: The “chuck” that holds the bit. Routers typically come with 1/4-inch or 1/2-inch collets. (Pro Tip: 1/2-inch bits are more stable and vibrate less).
- Variable Speed Dial: Critical for safety. Large bits must spin slower to prevent burning or kickback.
- Depth Adjustment: Fine-tuning knobs that allow for “micro-adjustments” (often down to 1/128th of an inch).
- The Sub-Base: The plastic plate that touches the wood. These are often replaceable or customisable for specific jigs.
Router Bits: Your Cutting Edge
A router is only as good as the steel (or carbide) you put in it. There are two main types of bits:
- High-Speed Steel (HSS): Cheap and sharp, but they dull quickly, especially in hardwoods.
- Carbide-Tipped: The industry standard. They stay sharp significantly longer and handle heat much better.
Essential Bits for Every Starter Kit:
- Straight Bit: For cutting grooves and dadoes.
- Round-Over Bit: To soften sharp corners.
- Flush-Trim Bit: Used with a template to duplicate shapes exactly.
- Rabbeting Bit: For cutting “notches” on the edge of a board (ideal for cabinet backs).
- Cove and Ogee Bits: For classic, decorative furniture edges.
Handheld vs. Router Table: Two Ways to Work
One of the biggest debates in woodworking is whether to move the tool over the wood or the wood over the tool.
Handheld Routing
Perfect for large workpieces that are too heavy or awkward to move. You clamp the wood down and guide the router along the edge.
- Tip: Always move Left-to-Right when routing an outside edge to ensure the bit’s rotation pulls the tool into the wood, not away from it (this prevents “climb cutting”).
The Router Table
Mounting your router upside down in a table transforms it into a mini-shaper.
- Best for: Small pieces (where your fingers shouldn’t be near the bit), long runs of moulding, and using large-diameter bits (like panel raisers).
- Safety First: Use featherboards and push sticks to keep your hands away from the spinning bit.
Advanced Techniques: Moving Beyond the Basics
Once you’ve mastered the “round-over,” it’s time to unlock the router’s true potential.
Template Routing
By using a bearing-guided bit or a guide bushing, you can follow a plywood template to create 10 identical table legs or complex curved shapes. This is the secret to professional-grade consistency.
Joinery: Mortise and Tenon
Forget the chisel. With a plunge router and a simple jig, you can cut perfectly square mortises for rock-solid furniture joints.
Signs and Inlays
Using “sign-making” bits, you can freehand or use stencils to carve letters and intricate patterns into wood, later filling them with contrasting wood or epoxy resin.
Safety: Respect the Spin
A router is a high-speed tool, and mistakes happen fast. Follow these non-negotiables:
- Eye and Ear Protection: Routers are incredibly loud and throw chips everywhere.
- Bit Depth: Never bottom out a bit in the collet. Push it in, then pull it back about 1/8th of an inch before tightening.
- Multiple Passes: Never try to cut the full depth in one go. Take several light passes to prevent burning the wood or snapping a bit.
- Direction of Travel: Understand the “Feed Direction.” If the tool feels like it’s trying to run away from you, you are likely routing in the wrong direction.
Maintenance and Care
A well-maintained router can last decades.
- Keep it clean: Use compressed air to blow out dust from the motor vents.
- Bit Sharpening: Use a diamond hone to touch up the flat faces of your carbide bits.
- Collet Care: Occasionally clean the collet with a bit of solvent to ensure it grips the bits tightly without slipping.
Start Your Journey
The router is the bridge between amateur DIY and professional woodworking. It’s a tool that grows with you—as your skills improve, you’ll find yourself building jigs and buying specialized bits that allow you to create pieces you never thought possible.
Key Takeaway: If you’re just starting, invest in a mid-sized combo kit (around 2.25 HP) with both bases. It will provide enough power for almost any task and the flexibility to learn both plunge and fixed-base techniques.
Leave a Reply